It would seem like replacing the alternator is a simple job - two bolts, a few electrical connections, and then slip off the belt and put in the new alternator right? Well.....
Let's just say that the alternator replacement has one or two minor details which are not mentioned in the manual from Chilton's or the Honda Workshop manual. The most difficult part is actually getting the alternator out of your engine compartment. You think, "No, it couldn't be that big a deal right?" Actually if you research this job online you'll find some people go as far as to remove their entire engine just to get at this part. Wow. Others remove the entire front driver side suspension and CV joint - UGH! While these methods also work, you can make room to remove your alternator by simply removing the plastic splash guard in the wheel well and the two brackets which support the alternator. Then the alternator can be removed through the wheel well with no trouble at all! I'm not saying this is the method to use, but it is an alternative method and worked well for me (and BOY is it easier than taking out the engine or taking apart the suspension!).
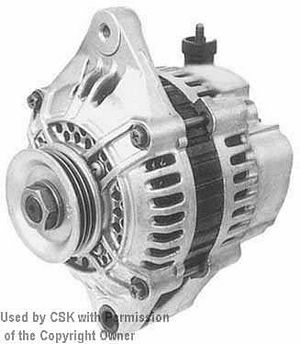
Pre-replacement:
Test your alternator using any of the common tests. First go to oreilly or autozone or a similar store and then have them test your battery and you could also have them test your alternator (it's all free, so why not?). I was able to determine that my alternator was bad because the battery would hold a charge and the car ran fine for a while, but the check battery light would not go out. I tested the voltage at the white wire on the alternator and with the car off the voltage was 12.1V, i.e. battery voltage, and when the car was started, the voltage went down to 4 Volts. Not good! I had suspected my alternator for a while because my battery (new battery) would tend to discharge if I turned off the car and ran my radio and other power drains for a period of time. There were other possibilities and I haven't really considered testing for the problem here. The honda manual has some good checks, and going to a free testing place such as Oreilly/Autozone works well also. I mainly want to address the challenging parts of changing the alternator.
Steps:
1) Disconnect your battery negative (ground) cable from your battery (the black wire)
2) Disconnect the large wire plug from the back of your alternator by pressing in the tab with your finger as you gently work out the plug. DO NOT PULL BY THE WIRES!!! Never disconnect any plug by pulling on the wires
3) Use a small metric socket and ratchet wrench to remove the nut holding the white wire in place on the alternator, then slide the wire off the alternator. If you can't get a tool in place to loosen this nut now, wait until the alternator is loose and have a friend hold the alternator in a more convenient angle so you can get a tool in place. Just be sure not to strain the wires by pulling on them.
4) Now there are several wires and brackets which hinder your hands getting at the alternator. You can easily remove each and then get those cables and tubes out of your way. It's worth the extra few minutes as it will save you in the long run, and will reduce your frustration level.
5) It's a good idea to change your alternator belt and AC belt in the process since you will be loosening them anyways. Drop the AC compressor pulley tensioning wheel by loosening the bolt at the top of the pulley bracket. Then you'll also need to loosen the nut holding the pulley wheel on. I only rotated it a turn or so and then the wheel dropped no problem. Be careful spraying WD40 on these bolts as you don't want to get anything on the insides of the pulleys and belts if possible. Dirt/grease/etc can make the pulley slip, and that's bad.
6) Once the belts are loose you can remove both of them. Note which goes where and what size they are. You'll need to make sure these are matched by the new belts
7) Now remove the two bolts holding the alternator in place. I removed the top one first, then raised the vehicle from the side (be sure to chock the tires and use jack stands and a chock for the rear tires to prevent rolling - NEVER GET UNDER A VEHICLE WITH ONLY A HYDRAULIC FLOOR JACK!!! I KNOW OF PEOPLE WHO DIED FROM THEIR CAR DROPPING ON THEM!!!) and removed the bottom bolt from under the car - a short pipe extension will help here - I bought a 1-2 foot copper pipe with a ~1" diameter from home depot, and you can slip your ratchet right inside it. Get the right diameter for your tools. It's really inexpensive this way, and these bolts just need to pop loose then can be easily (relatively easily) removed. There isn't alot of room around the alternator area of the engine compartment, so be patient. WD40 really helps here. Spray it carefully on these two bolts (not too much, so you don't get it on anything else- just a little will do). You should probably replace these bolts, as I know mine were somewhat corroded and became damaged during removal. I had to use a large set of vice grips to break the top bolt loose. The bottom yielded to a breaker bar extension on my ratchet. The angles are such that you aren't applying torque from the best angle. The alternator will need to be worked loose from the bottom bracket, this is normal. It's heavy so don't drop it when it comes loose.
8) Remove both brackets that the alternator was attached to. Use a breaker bar if necessary
9) Now just remove the splash guards inside the driver side wheel well. It's three plastic screws, then you can move it all the way.
10) Slide the alternator out through the wheel well. You'll probably need to rotate the steering wheel to the left to get your hands in there. It helps to have two people - one to get under the car and pass out the alternator, and one to take it from the wheel well side.
11) Now put the new one in by sliding it in through the wheel well. Installation is the reverse of the removal. Torque all bolts according to a manual. Replace any bolts which are worn, damaged, corroded, or just look old. It's really cheap to do, and if you ever need to get these bolts off again, it will be easier. If they lasted 15 years, you'll have another 15 of good use. Try to get zinc plated bolts to keep them from corroding.
12) Done! Now Start your engine and test the voltage between the alternator white wire and engine ground. It should be between 13.5 and 15Volts. Turn on the fans, headlights, etc, and test the voltage - should still be in the range 13.5-15Volts. If so, you are done! Go drive around the block and test the voltage again. Also, of course, your check battery light should not stay on when you start your ca